 Trip Alertz For Jetsetters, By Jetsetters
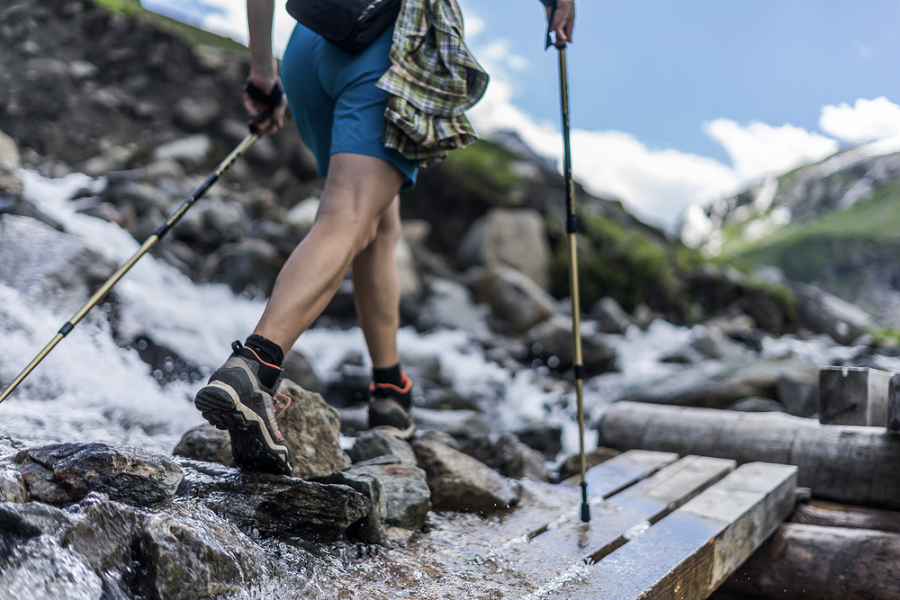
Source: lzf/Shutterstock.com
If you’ve ever had an injury on the trail, you know how hard it is to make it back. Hobbling your way along, each step begins to hurt, which adds further injury and pain. But instead of letting an injury on the trail stop you from getting outside again, consider the following tips and exercises.
When you perform these exercises and take certain precautions, a day out on the trail can end injury-free. For starters, you can learn how to read a topographic map to avoid craggy areas that cause injuries in the first place. You can also make sure to carry a headlamp, allowing your hands to be free to catch yourself in a fall. Another basic precaution is to stay hydrated, carrying a water bottle in a waterproof cooler backpack. Ultimately, preventing an injury on the trail comes down to preparedness.
Eager to hit the trail? Here are some exercises to get your feet, ankles and knees ready for whatever route you take.
Hiking Injuries: The Foot
When hiking, you put all your weight on your feet, so it’s no surprise this is where many injuries occur. And the most significant cause of foot-related hiking injuries is overpronation, which occurs when the foot’s arch over-flattens. Typically, this is caused by placing too much weight on your foot and wearing improper shoes.
If not treated correctly, overproponation can lead to all types of foot pain, including shin splints, Achille tendonitis and agitation of the iliotibial band, which leads into the leg, too. So before you start your hike, make sure along with carrying natural pain relievers, that you do these exercises to get your feet prepared.
#1 Short Foot Exercise
Maintain the arch of your foot and all its muscles with the short foot exercise. Completing the exercise in bare feet for greater mobility, all you need is a chair. While a simple and subtle exercise, it’s tricky to do until you get the hang of it. But keep trying!
- Sit in the chair with your feet on the floor and toes relaxed. Keeping the toes relaxed, contract your foot muscles and raise your arch. The goal is to keep your toes flat and avoid curling them as you contract your arch muscles.
- Once you get used to flattening the toes on the ground as you contract the foot’s arch, hold the arched position for five seconds.
- Further still, once you get used to this exercise sitting in a chair, try it standing up. After all, you will be making this position with your feet naturally as you hike a trail.
#2 Heel Raise Exercise
This heel raise exercise is wonderful for those who experience plantar fasciitis. All you need is a step.
- Standing on a step, hang your heel off the back to allow for greater mobility.
- Complete this exercise on one foot at a time, but feel free to use your opposite foot to assist in the raising and lowering motion.
- With your foot still planted half-on and half-off the step, rise up for three seconds and hold for two seconds. Allow your heel to go back down, taking a full three seconds.
#3 Calf Exercise
Sometimes, hikers feel their calves locking up and tightening mid-hike. Luckily, there’s a straightforward way to solve this – even on the trail! All you need is a trekking pole and a rock or object to sit on.
- Sitting on a rock, log or something along the way, take your trekking pole and place it beneath a calf.
- Roll the trekking pole around each calf to soften and decompress the muscle. Do this for five minutes to really feel the results. Also, move your foot up and down to stretch the calf as you do so.
Source: Ondra Vacek/Shutterstock.com
Hiking Injuries: Ankle Sprains
When you sprain your ankle, it’s essentially adding stress to a key ligament outside the ankle. If it’s a bad sprain, the balance receptors will be muted, in a sense, meaning you will be off balance once you begin hiking again. To unmute your balance receptors, here are some basic strength-building and balancing exercises.
To avoid sprains, be wary of your surroundings, too. According to one study, most sprains caused on the trail occur on lateral (70.4 percent), scree ground (70.4 percent) and downhill slopes (50 percent). So when you hike across rocky environments and make your way down slopes, be extra careful.
#4 Figure-Eight Hop Exercise
As mentioned, one of the best ways to prevent an ankle sprain is to build ankle strength. Follow this figure-eight hop exercise and you’ll be prepared for the next craggy trail route.
- Mark an X-shaped grid on the ground using tape or chalk on the pavement.
- Stand in one corner and hop diagonally, sideways and then diagonally again in the shape of a figure eight and back to the start position.
- Repeat this hopping exercise on each leg six times, alternating directions after three rounds.
#5 Balance Exercises
The main reason you get an ankle sprain is because you are thrown off balance. So make sure to keep your balance with this exercise.
- In bare feet, stand on one foot, safely in a doorway or near a countertop for as long as possible. Essentially, you are trying to build the arch, similar to the previous short foot exercise. The trick is to keep stable, preventing your knee from moving forward.
- Do this exercise several times a day, holding each position for 30 seconds.
Hiking Injuries: Knee Pain

Source: Cameron Stephen Prins/Shutterstock.com
On the trail and especially when headed downhill, your knees take on a lot of weight. Orthopediatricians suggest that your knees can absorb eight times your body weight, which can eventually lead to pain. But this is a bit hard to avoid, since nearly every hike has a downhill slope. Instead, try these exercises to get your knees in shape:
#6 Bulgarian Split Squat Exercises
- Place one leg on a chair, keeping the weight on the front foot.
- Lower and raise your leg, keeping your torso upright without arching your back.
#7 Single Dead-Leg Deadlift
- Stabilizing your midsection and torso, lean forward and reach for the floor. Make sure to keep your hips level and back flat, too.
- Pull yourself back up, using your leg’s back muscles and glutes. This will add strength to the muscles behind your knees.
When to See a Doctor
You can do many exercises to keep your muscles and bones in shape to avoid a hiking injury. However, you should learn when you can’t treat the pain on your own and when to see a doctor. If you have sharp pain or a pain that lingers for days, it’s time to talk to your physician or seek out a specialist. Other warning signs might be numbness, tingling or swelling in the area.
Ultimately, take care of your body and it will take care of you. Listen to its needs, especially when out on the trail, and use supportive shoes, trekking poles or whatever helps alleviate problem areas. And remember to enjoy your time outside. It’s not always a race!


